Disney Nerds Getting Crafty: Spaceship Earth Wall DIY
Do you want to bring some Disney into your home? In this guide I will walk you through the steps of painting an accent wall as SpaceShip Earth!
EPCOT is my favorite park so when I saw people painting their walls as SpaceShip Earth, I just had to give it a try! While it is not as simple as it looks, anyone can do it! I just takes time and patience… and a whole lot of tape! I will show you step by step and what items you will need to get the job done. This task took me about 22 hours solo to pull off. It helps if you have someone do this with you. Without further ado, lets get started!
What tools and supplies are needed?
Glad you asked! I will list off everything I used and the total. Please note; the wall I did this on was 10 ft by 10 ft. The volume of supplies you will need will be based on the size of the wall you’re painting.

The first thing you will need is black paint. I got a basic eggshell black paint. This cost me $18 for a pint. I got a one-coat coverage so that played a big part in only needing a pint. This was enough to paint the base wall and use left overs for touch ups.

Next you will need thin 1/4 inch painters tape. I purchased this on amazon and it was just enough to get the job done. If you are painting this on a bigger wall, I recommend purchasing two. At $7 a pack for three, it’s better to be safe than sorry if you do not have enough!!


Time for the colors! These three colors are by Sherwin Williams, which you can find at Lowes. For each color I got a pint size of it in showcase semi-gloss. That way you can have a small shine which helps the illusion affect you are going for. I ended up only needing half of the pint, so you can get less if your store gives that option. Sadly the small sample size is just not enough. The total for these three colors cost me $60.
As far as brushes go its all about preference. I used two angled brushes one being a medium size and the other was a small one. I also had a fine pointed artist brush to go back and clean up spots. This was around $20.
The final total for my wall was around $110.
First step!

You will want to take regular painters tape and go along the wall to be sure you do not paint something you should not! Once you’ve taped it off, its time to apply to black base! I used a roller on the majority of this. Since I used a one-cost coverage paint I did not need to go over it. You want to be sure its even so the black lines do not appear fading in the final outcome.
This is probably the easiest part, but the fun is yet to come!
And so the taping begins…
Time for some taping! I mean this when I say…TAKE YOUR TIME. This part is huge. You will first want to make your horizontal lines. I did a 18 inch space in between each line but I started randomly in the middle of the wall. I wanted the triangles to continue or “off the wall” so it looks like it keeps going. Use your level during this step to ensure you get perfect straight lines.

Alright, you’re another step closer! Now it starts to get a little tricky. From this point I made marks with a sharpie going from right to left on those horizontal lines I just made (Please note; I used tape to show the marks for better visual representation). Starting from the top line, I went 18 inches to the left and put a piece of tape to mark the spot. I did that across the whole line. So every 18 inches put a mark. The next horizontal line down from right to left, I made a mark at 9 inches to start with and then one at every 18 inches after that across that line. You will do the one time 9 inch mark every other horizontal line and then you will get something that looks like the image below. I promise this makes sense in the next step!

Now that we have made our marks, we will now make diagonal lines with tape using those marks we just made. Start from the top and go down. I removed each “mark” of tape one I placed my diagonal line over that point. Again, I actually had sharpie circles on those marks. You will do this is both directions from top to bottom. After you do that your wall should look like this.

That was not so hard now was it? Now, I know what your thinking… its going to get very difficult now. WRONG! Its not as difficult as it appears because of all the steps we just did! From this point on if you like being precise, then break out your ruler. Honestly, I eyeballed it. From the top point of each triangle you will want to go in about 11 inchs towards the center. Then you will make a tape line from the 11 inch mark all the way to the tip top of the triangle. Doing this to each one will give you those black center points you see.
After you have put your center line in each triangle you will take a piece of tap from the other two remaining corners and connect it to that 11 inch center point.
After doing that your wall should then look like…

Crazy right?! It looks so cool already and you have not even gotten to the best part yet! I will say this… the taping all together took me a day. Make sure you do not rush this process since it is so precise.
Time to paint!
Here comes the best part! Painting! While it is not difficult, it is time consuming since you have to be very careful. I recommend opening up all three paints and marking each part so you know what you need to paint! Once you’ve done that, I recommend starting with the lightest color. You do not have to worry about running over the lines until you get to your last color. Each color took two coats for me. By the time you finish painting each triangle part, you can apply the second coat.

It looks crazy I know, but this is a “trust the process” type of thing. In this photo you will notice I painted two triangle sections of the lightest color. The next two colors you only have to paint one section of each color.
Hang in there its coming together! Its best to have these pictures in front of you during this to mimic if you want this exact look. In the end, you can paint the colors is whatever order you like. Have fun with it!

Second color and almost done! At this point you should be able to see the direction this is going in. Again, you do not have to be as careful painting over the lines this time, but make sure you are careful when painting adjacent to the lightest color.

Last color! Boy can you see it coming together now!! This color you need to be VERY careful to not paint into the other triangle parts. Doing this will make less clean ups once you remove the tape! If you are like me and you have spent the whole day painting, let it dry over night and get some energy to remove some tape!
Last we remove the tape!
Time to see all your hard work come to life. When removing the tape… GO SLOW! You can easily lift up paint causing the black lines to come up. Go ahead and have all your paints opened up to make some corrections. I took it a section at a time. This process alone took a few hours.

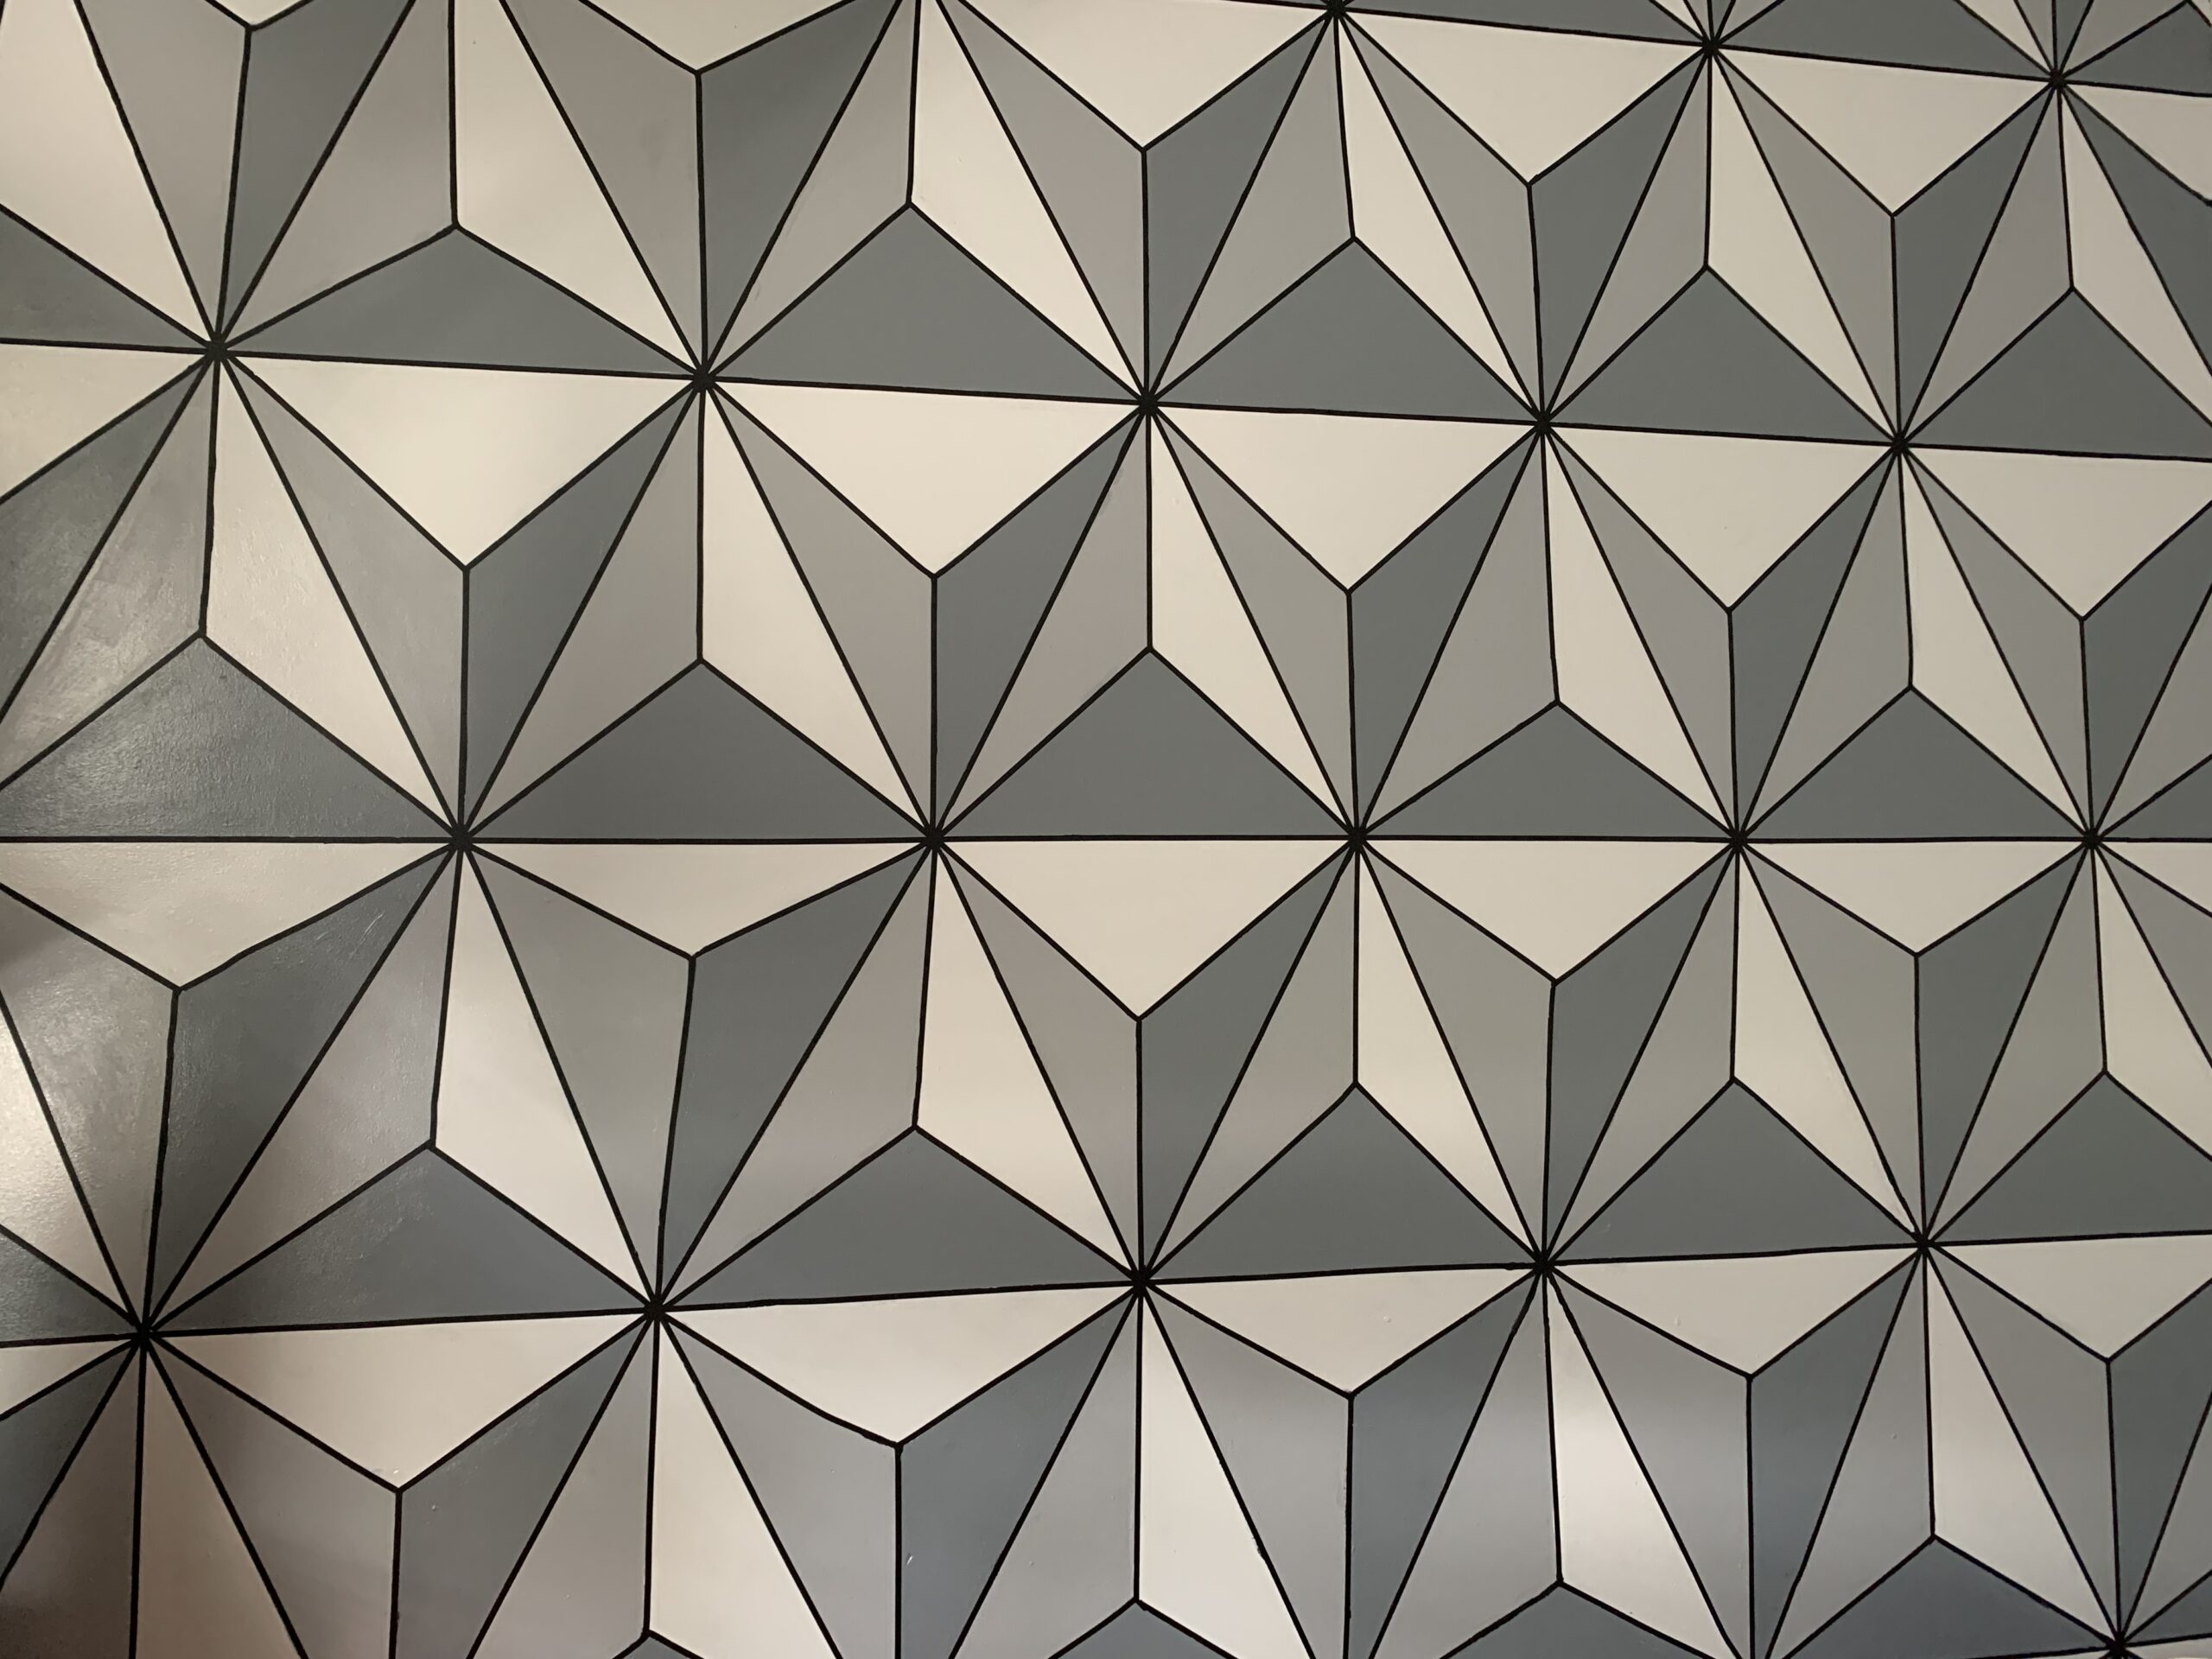
Final reveal!

Needless to say, this process is long and not very easy… but with time and patience it can be done! When you take a step back and look at your work, you realize it worth it. This will become a piece of art you have to show your guests! It almost feels as if Imagineers came to your home and added a touch of Disney! Are you going to give this a try? If so, share it with us!


Wow! That’s amazing! That is definitely a great Disney touch for a home.
We agree! This wall is amazing!!